Monday, September 30, 2019

September Colours

Sometimes a quilt is all about
the pattern design.

Sometimes a quilt is all about 
the colors.

And sometimes it is all
about using the fabric.
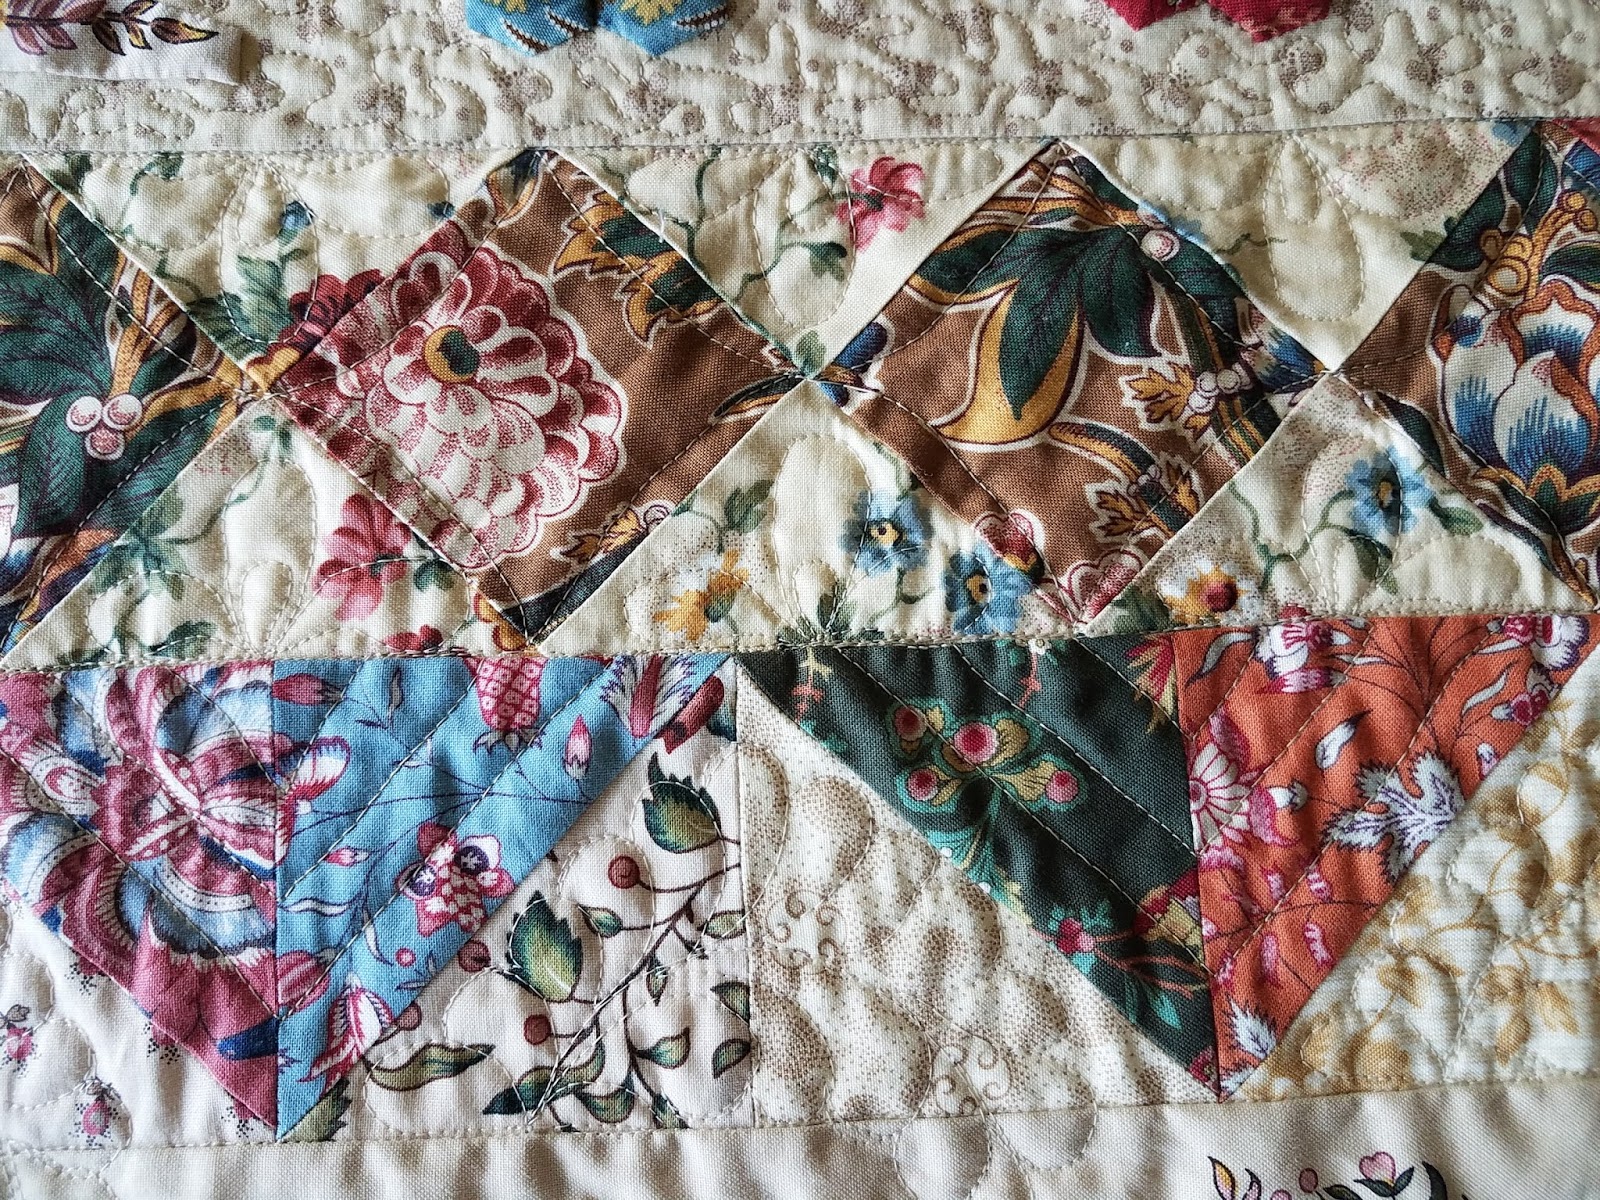

"September Colours"
27" x 36"

My mini quilt of the month 
might be called
"September Colours",
but really it's all about the fabric.

My inspiration was 
from Margaret Mew's book
Quilts from the Colonies.
She had used what she called,
a wavy print, 
in the sashing and borders
of her quilt called
"a-Tisket a-Tasket".

Di Ford, who designs for Andover Fabrics,
has many so called "wavy prints". 
I chose this wonderful plum colored design
 from her Windermere collection.
It was the same lovely color of the
prairie sage that was blooming.


September is also the time
to harvest fruits and vegetables 
from the garden and carry them home 
in baskets. What better pattern
to use for a September quilt.


I kept the quilting simple so
as not to distract from
all the fabulous fabrics.


In my attempt to mathematically
 figuring out my pieced border,
I humbly created four different corners.
They just make me smile.


But my eyes aren't going to
my mismatched corners, but rather
to that delightful "wavy print" and
all of the other prints creating
lots and lots of texture.
I love that wiggly sashing!

What have you done with
a print like this?

It's that time again when
those of us that have been
following along with Wendy,
check in with our monthly creations.
Take a moment and 
see what others have been working on.
It's always an inspiration. 

Until Next Time-
Kyle


Tuesday, September 17, 2019

A Fall Jaunt

Running Man and I
have packed our suitcases once again.


Heading East and North this time
for a fall jaunt.


You never know who you
might see while on
Prince Edward Island.

We'll catch up soon.

Until Next Time-
Kyle

Wednesday, September 11, 2019

Summer Finishes

My unstructured days 
of summer have finally allowed
me to finish two quilts.
that had been lingering.

"Scrappy Rings"
55" x 60"

and 


"A Dutch Garden"
65" x 65"

The Scrappy Rings pattern
had been a weekly challenge


No borders and then with simple diagonal quilting


all those hundreds of different fabrics
could remain the stars.


I approached it mostly as a 
leaders and enders project, but
then as always with a L and E project,
I finally just sewed to get it done.

After having breakfast with girl friends this summer
they very willing agreed to help
me with a Fort Collins Old Town photo shoot.


Thanks Liz and Debbie.


A Dutch Garden was a kit 
I purchased at the Houston International Quilt Festival
of the Netherlands.

The kit came with that beautiful
outer border fabric, the center medallion,
and a few other key pieces.
The rest I filled in with my
treasured pieces of Dutch fabrics.


The design included all
kinds of fun piecing, broderie perse applique
and of course, hexagons.


I felt it needed to be heavily quilted 
and that challenged me to be creative with
my limited machine quilting skills.


 The real challenge came when
trying to decide what to do in that
very wide outer border.

I figured it had to be more feathers.
That's what I did in a very organic way!


A little harder to see, but there they are
weaving their way over all those flowers.


No binding was attached to finish the edge,
but rather I used a facing to give it a clean look.

During my photo shoot at the 
Colorado State Perennial Gardens,
something thought it was a real garden


I guess that was the real test
that I had created a "A Dutch Garden".

 Until Next Time-
Kyle

Wednesday, September 4, 2019

Stars Upon Stars Blocks

Slowly, very slowly.

A few of my
 Stars Upon Stars blocks
are being finished.
Well, at least 4 of them.


Thought you might like to see
how they're coming along.

There is absolutely no way
these blocks would have come out
without stretching, tweeking, changing,
ripping, or tossing
if I hadn't used 
Jeanne's stamp set for this pattern.

The rubber stamps make every piece
exactly the same, 
no tracing errors or
inconsistency.

Each block requires 9 fabrics for the stars.


And then a background and
fabric for the corner stars.

These blocks definitely require
hand piecing. 


That center is about as close as I can get.


Lots of 8 pointed stars


Each block finishes at 16"
( So far, so good)

Thought You'd like to see
the back as well.

Just as much fabric on the back
as on the front.
Pressing is key!
Not sure if I've done it the best way,
but at least the blocks are consistent.

I've 3 more blocks cut out
and ready to put together.

This is and will be a project
where I'll find myself


enjoying the pleasure of slowing down
for quite awhile.

Until Next Time-
Kyle