Showing posts with label hand stitching. Show all posts

Monday, January 10, 2022

Flower Garden Blocks 1940's

Taking on another Quilter's beautiful
Flower Garden blocks has been a 
lovely way to start the new year.

If you remember, I bought these
blocks at my Quilt Therapy silent auction
in November and throughout the holiday
I have been enjoying slowly piecing them together. 

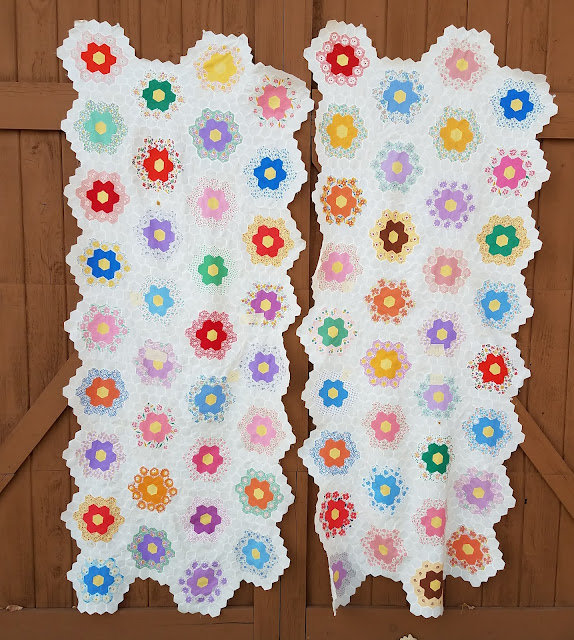
There ended up being 97 individual blocks.
I have sewn them into long panels 
and are now sewing very long
zigzag seams.
 

All the while, 
I have been trying to figure out,
why the blocks were sewn both by machine
and by hand.
Were they sewn by two people or
if not, 
what was the Quilter thinking and what was the plan.

Well, I  figured out
she was a very efficient and systematic person.
She had come up with a plan
where she could save time and still
stitch perfect blocks.

Because she was not using an EPP method
she could vary her method of sewing.

Here's what she did.
After cutting out all her hexies,
and there are no pencil marks to indicate
she drew around a template,
she began sewing them together with a 
1/8" seams allowance.

Remember she did all
that fussy cutting .
A very talented quilter.

Step 1.
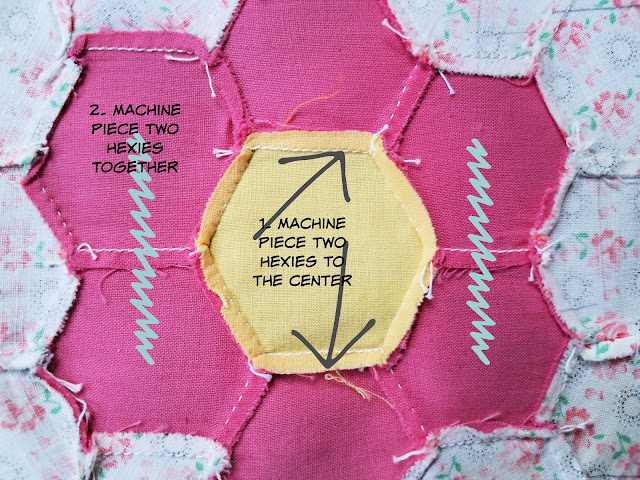

Then after machine piecing part of the first ring,
she sewed the two hexies on the sides 
to complete the ring by hand.
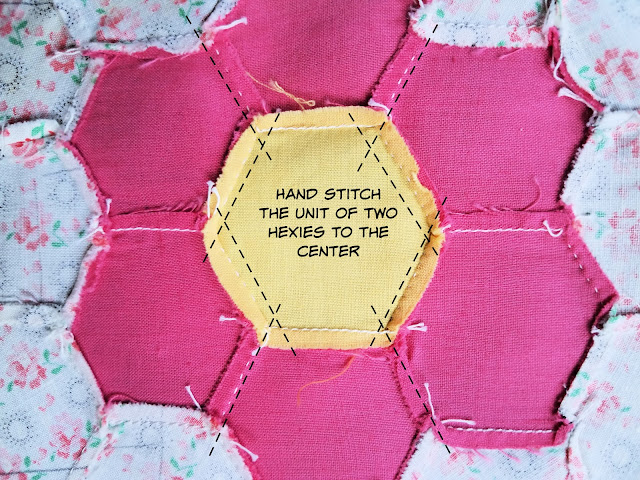

This clever Quilter found herself 
half the time at her machine and
the other half sitting and hand stitching.

Now look what she did for the next ring.
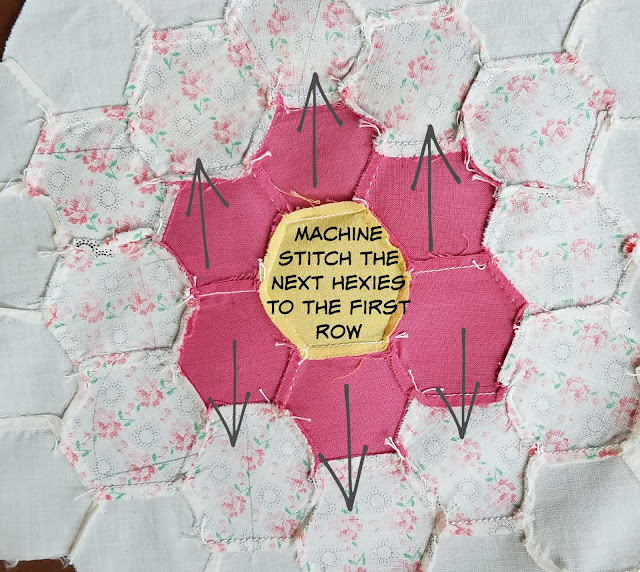

These next hexies would be floppy.

By leaving the seams allowances free
and because she used an 1/8" seam, 
she could easily insert and connect
other sections of a ring.
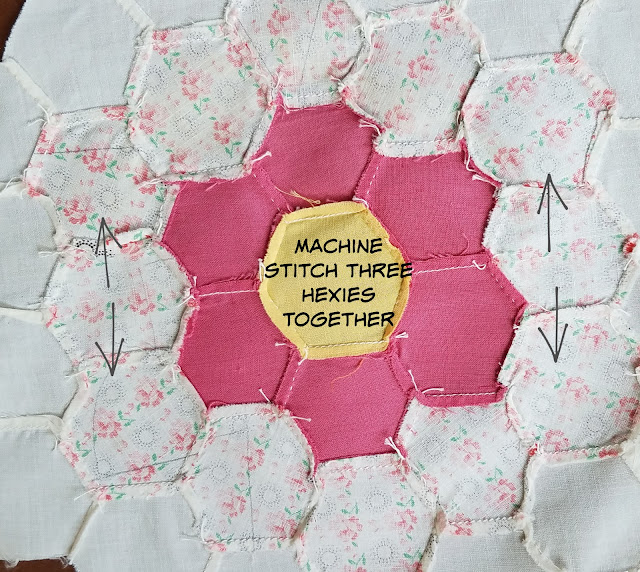


Do you see a pattern?
A bit of zigzag zag stitching.
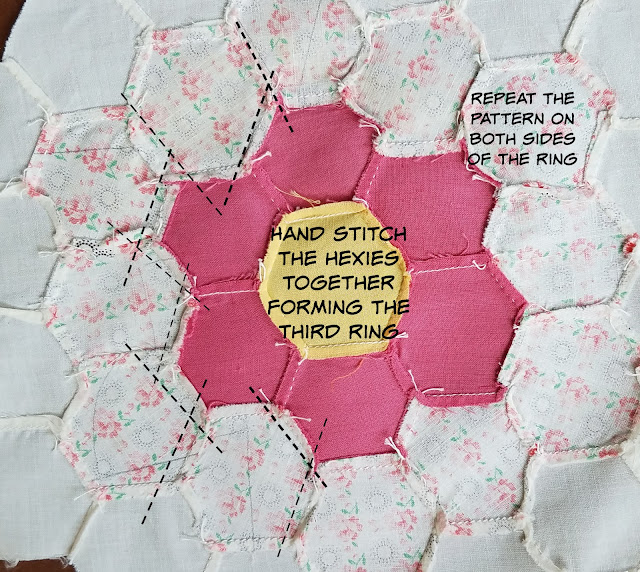


She could work on multiple blocks at a time
sewing a bunch at the machine
and then finishing the rings later.

Here's the third ring.
Sew individual plain hexies to 
the second ring, 
sew 4 plain hexies together in a row, and
then attach these to both sides.
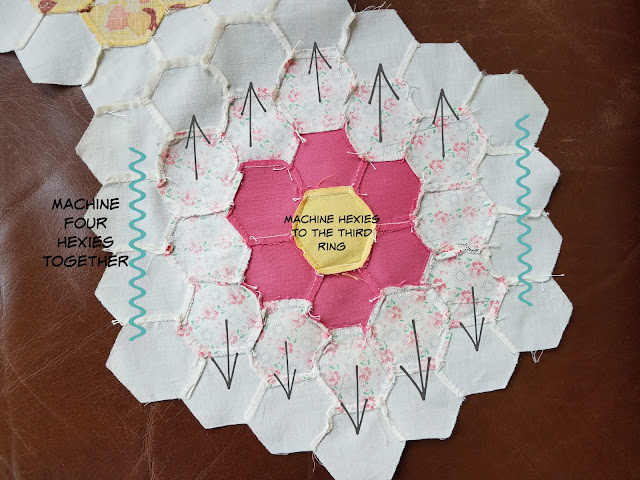

There's a completed block.

She could work on a bunch
of these at a time.
Her combination of methods seemed a
very efficient use of her time and skills.

But that's where she stopped.

I couldn’t think of a combo
method to sew the blocks together.
Could that have been part of the 
reason she put all these beautiful blocks away?

Whatever the reason, I feel very
fortunate to have been the next part of the plan.

So, slowly, 
 I've been zigzaging these together. ❤


Until Next Time-

Kyle


Thursday, December 1, 2016

The Gentle Lapping of Ocean Waves

After reading my title
did you think I had escaped to some
exotic warm tropical island?

I could only wish, but instead
with the busy holiday season and
a dilly of a holiday season cold,
I've been working on my 
vintage ocean wave blocks.

Minus one block
the center blocks for the quilt 
have been stitched.

You can tell right away 
these 30's and 40's prints
do not create the same graphic design
that you typically see with this pattern.
 The fabrics are not very high contrast.
So there isn't the dramatic distinction between lights and darks. 

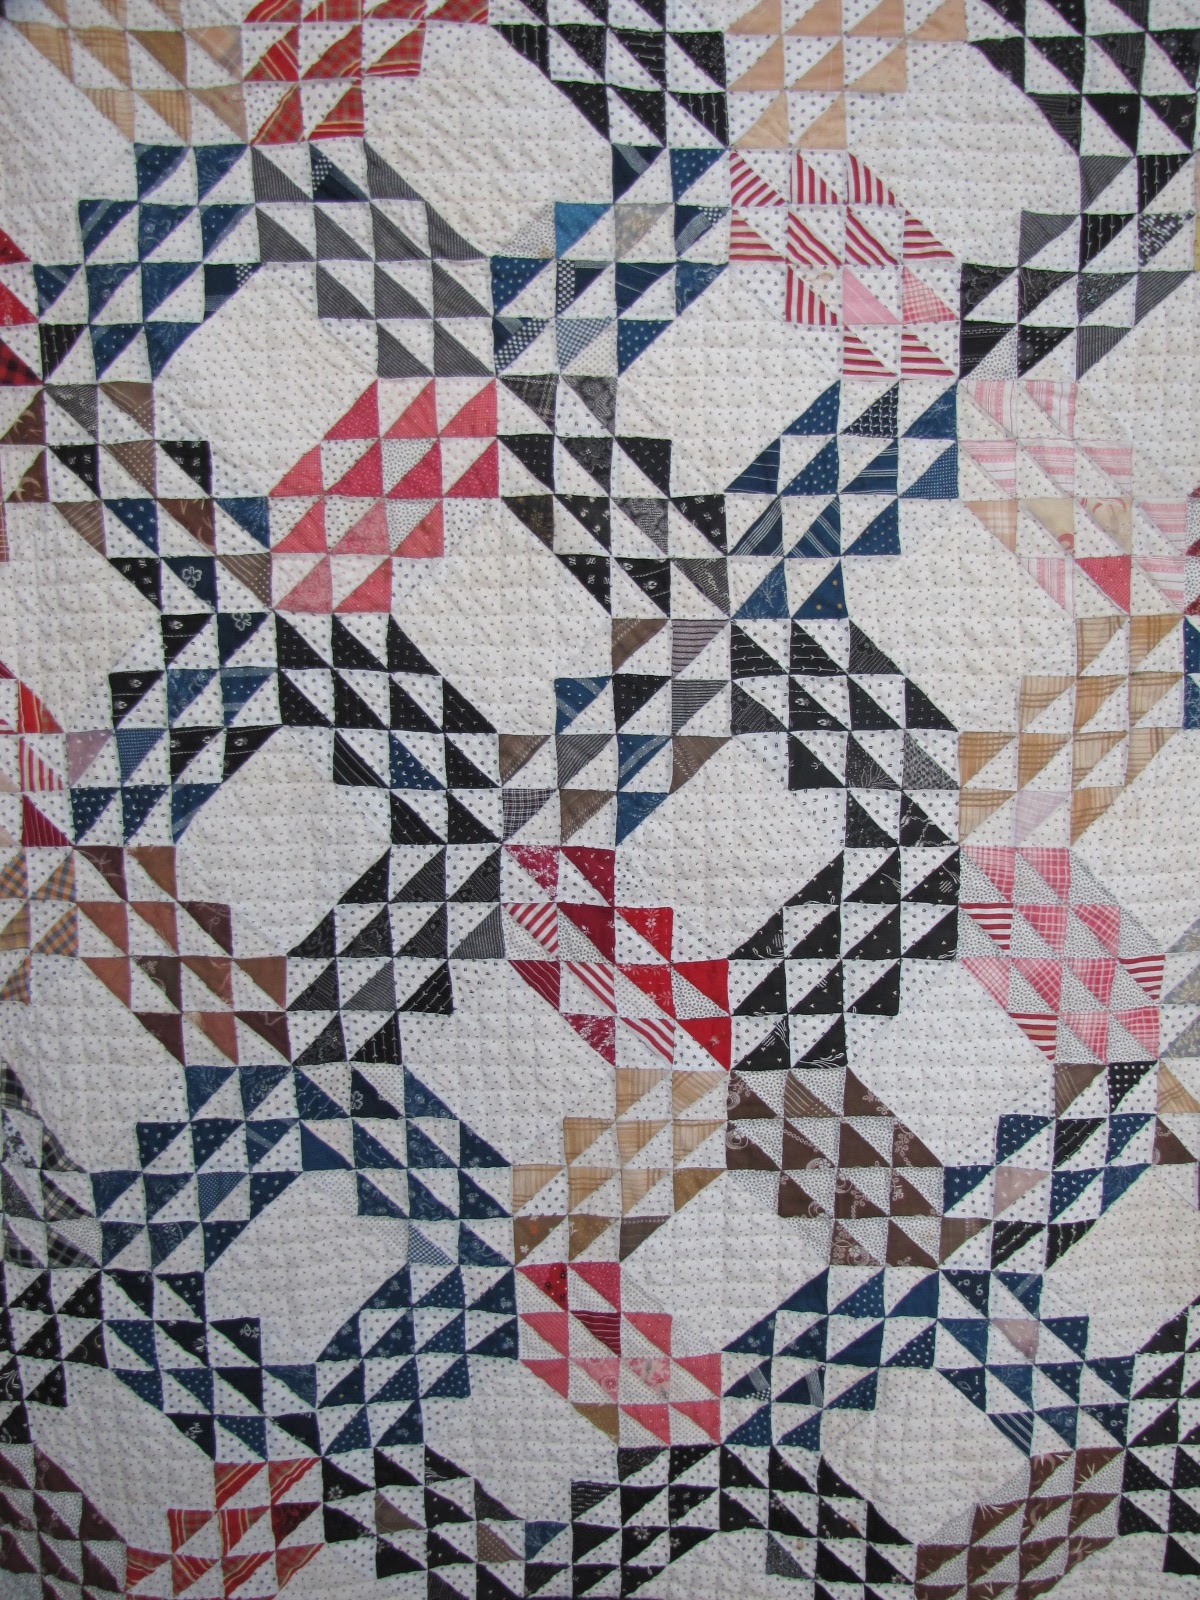
As compared to
  this antique Ocean Wave 
with early 1900's fabrics
I repieced and quilted in 2011.

The 30's fabrics make more
of a mosaic pattern with all
of the prints and colors meshing together.

I have more half blocks to piece
and then I think I'll have enough leftover pieces
for a simple border.

Hand piecing has proved for me the only
way to handle the inconsistent seam allowances.
After marking the finished size triangle
on the wrong side of the fabric 

the seams have varied from 1/16th to 3/8".

It's simple been the matter of 
carefully matching and pinning 
the marked sewing lines and
stitching on the line on both triangles.

I don't stitch the seam allowances down,
but rather allow them to flip
 to one direction or the other.
 
This allows me to get right up to the spot where
I need to match points.
I'm in the habit of making a couple small
back stitches with a knot on one side of the seam, 


passing through to the other side, 

 doing two back stitches with a knot
 and then continuing on sewing.

It may seem like a lot of extra steps
but it adds some extra security that it
won't come undone at the seams and it
keeps the seams snugged up tight together.

It's the rhythm of my hand piecing.
Just like the soothing sound of the waves
lapping on that warm sandy beach.
 
Until Next Time-
Kyle 


Wednesday, October 3, 2012

Hand Stitching


I've had several people ask me
 if I would share my hand piecing secrets.
 Nothing I do is a secret, 
so here are a couple of my how to tips.

 I use only cotton thread 
and pick a color that blends
 with the darker color
 rather than the lighter side.

 I  use a #10 between needle.
 I use this size needle for almost everything.

 Pieces that are going to be hand pieced
 need to have the stitching line
 drawn on the wrong side of the fabric.
The sewing line is important here.

 Then cut out with a scant 1/4 inch seam.
The cutting line isn't the important line in hand piecing.

 Place right sides together. 
Using straight pins match up
 the pencil lines.

Check the other side.

 I knot my thread and start with a back stitch.

 Then I use a small running stitch
 pushing the fabric onto the needle.

I usually get 4-5 stitches on the needle
and then slide them off.
 Small even stitches work best..


 When I start the next set of stitches
 I'm in the habit of starting with a back stitch
and then the running stitches.
 Better secure than sorry.
 
 I end with a back stitch and then a knot

When I attach multiple pieces together and
I get to another seam allowance,
I treat it as if I were starting and stopping a single piece,
 then poke the needle through to the other side of the seam
 and begin the pattern again.

 I do press as I go,
 just like machine piecing.

. Because none of the seam allowances are stitched down,
 you can manipulate them any direction that best fits the block.

 Ready to give it a try?
 Hope so.
 Until Next Time-